Although its not new thing to blog about but I am sure, it will help out most of the security analyst and bug bounty people out there looking for authorization issues
Have you ever encountered an application which has different levels of access. When I say levels of access I mean having roles like admin, Supervisor, Agent
Where
Admin = Full privileges
Supervisor = With some level of access
Agent = Having least possible access
Now what if you are asked to do authorization checks among these users, how many browser tabs will you be opening or how many incognito tabs do you think one will need to do that. Well if you understood the underlying problem I want to explain here then you are welcome to read the rest of the blog
Talking about Firefox Multi-Account Containers
Firefox Multi-Account Containers lets you keep parts of your online life separated into color-coded tabs that preserve your privacy. Cookies are separated by container, allowing you to use the web with multiple identities or accounts simultaneously - by Mozilla Firefox
How do I install it?
Navigate to URL https://addons.mozilla.org/en-US/firefox/addon/multi-account-containers/ and install it into your firefox browser. For chrome there are some alternatives which I do not like at all. Sorry Google chrome for being judgemental.
What does it do?
The definition above by firefox almost explains everything but we will see it into action here
Lets say I have three user
Admin
Supervisor
Agent
I want to login into all three at once without having to open new browsers or incognito mode or worrying about the browser cookies and cache storing problem.
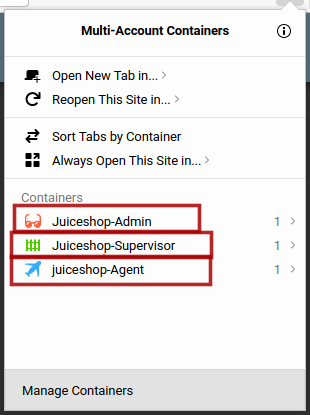
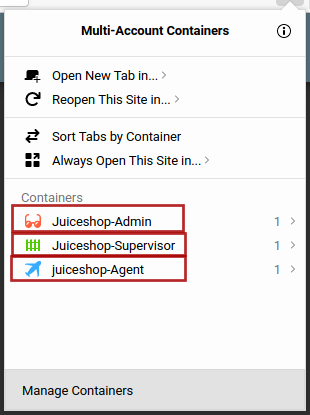
I will use Firefox multi-container and create new containers with thier names for my own convenience and will open the application in these containers as shown below
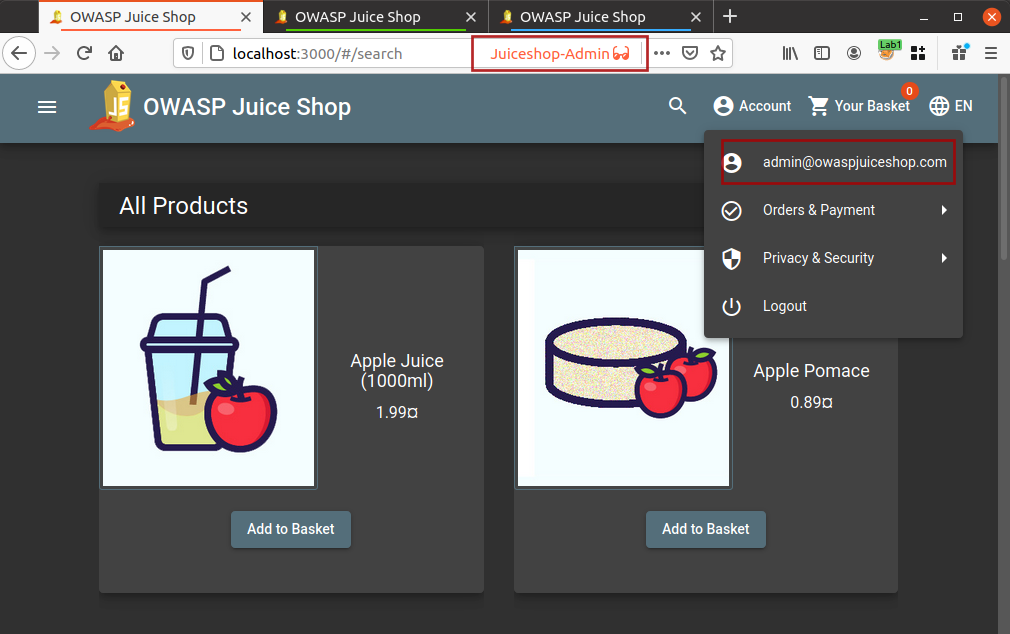
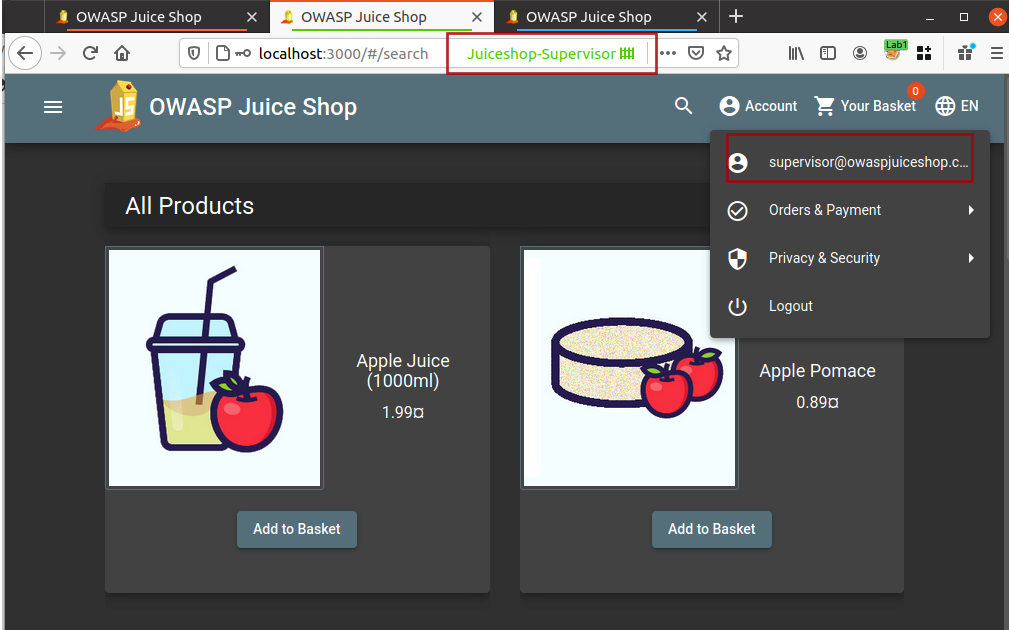
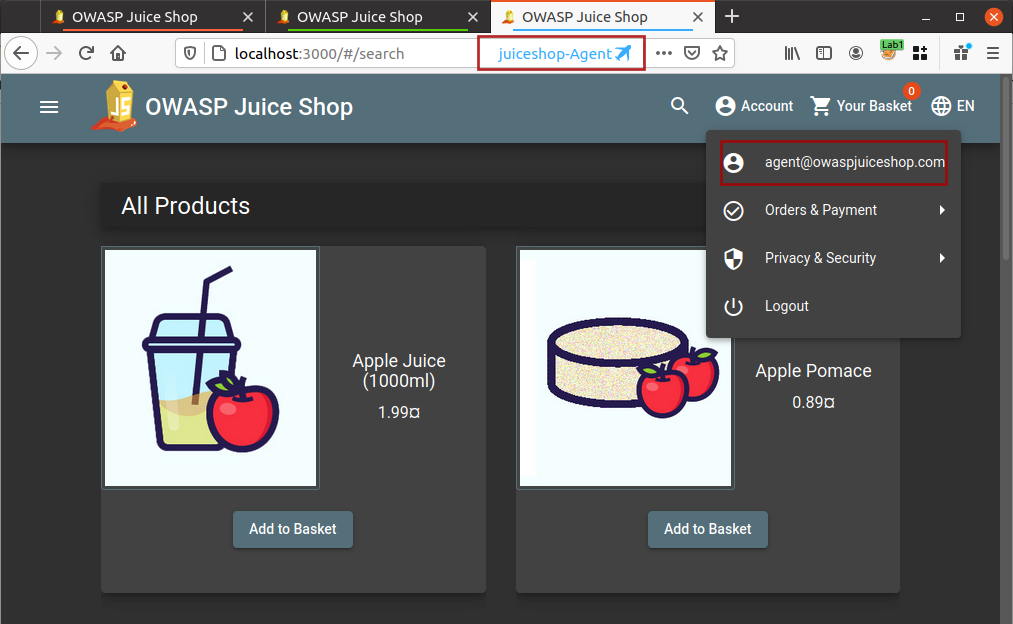
Now I am logged into all three different accounts and I do not need to worry about logging out and logging in for different user accounts.
If you are thinking that the blog title talks about authorization checks and that is not happening here then you need to read the rest of the blog because I am still adding the ingredients into the recipe.
Burp Suite Autorize
Autorize is an automatic authorization enforcement detection extension for Burp Suite. It was written in Python by Barak Tawily, an application security expert. Autorize was designed to help security testers by performing automatic authorization tests - By Barak Tawily
How shoud I install it?
Browse to URL https://github.com/Quitten/Autorize or install directly from Burp Suite BApp Store
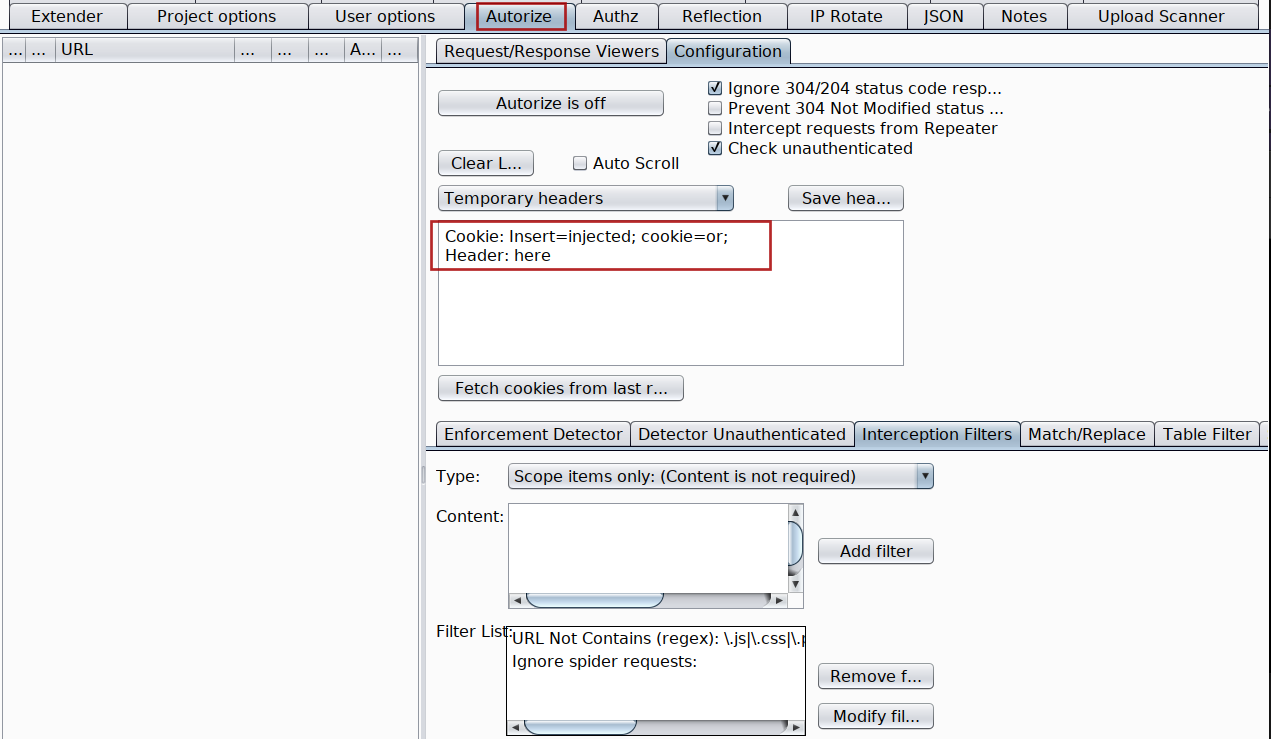
How to use it?
Either refer to the User Guide - How to use? mentioned at https://github.com/Quitten/Autorize or follow me step by step
-
Login using Agent user account into your application[User with least privileges] if not already logged in.
-
Intercept any request which contains the authorization token or if its cookie with session token
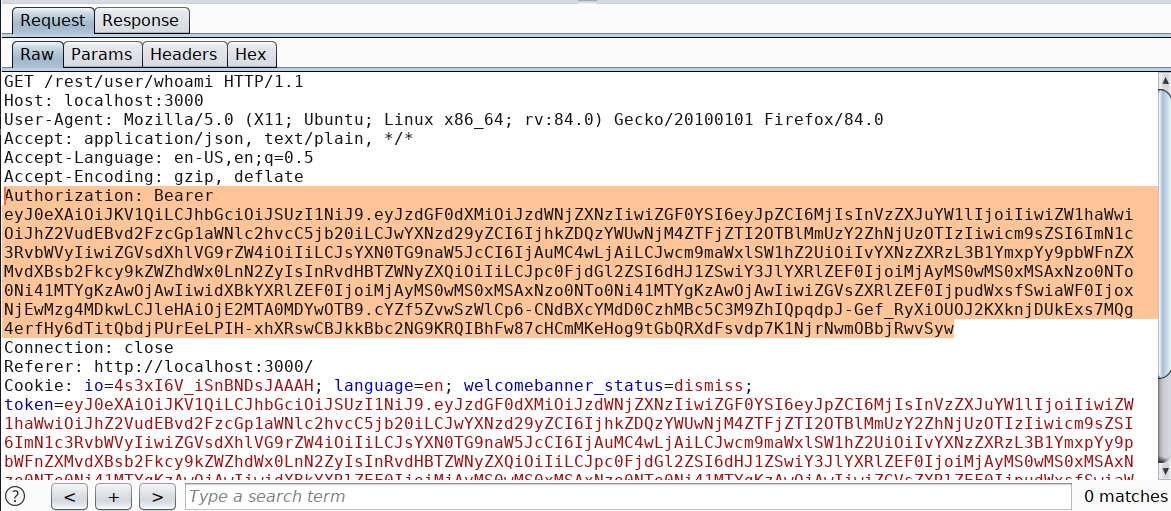
-
Copy the token with its header and paste it inside Autorize extension
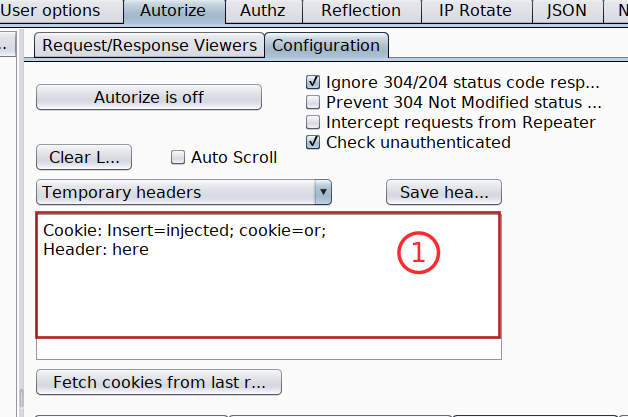
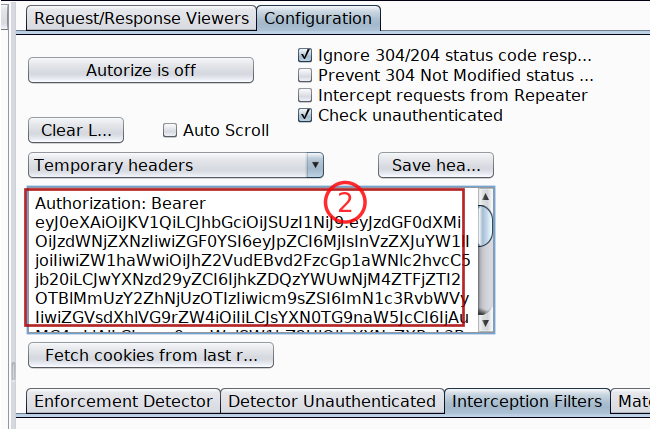
-
Turn Autorize on
Autorize is Onand do not forget to check the box withIntercept request from Repeater -
Because we already are logged into our juiceshop-admin container with admin user account into another tab, just switch into that tab and start browsing the application. Autorize will automatically flag all the endpoints which are vulnerable to authorization issues as Bypassed! in red color.
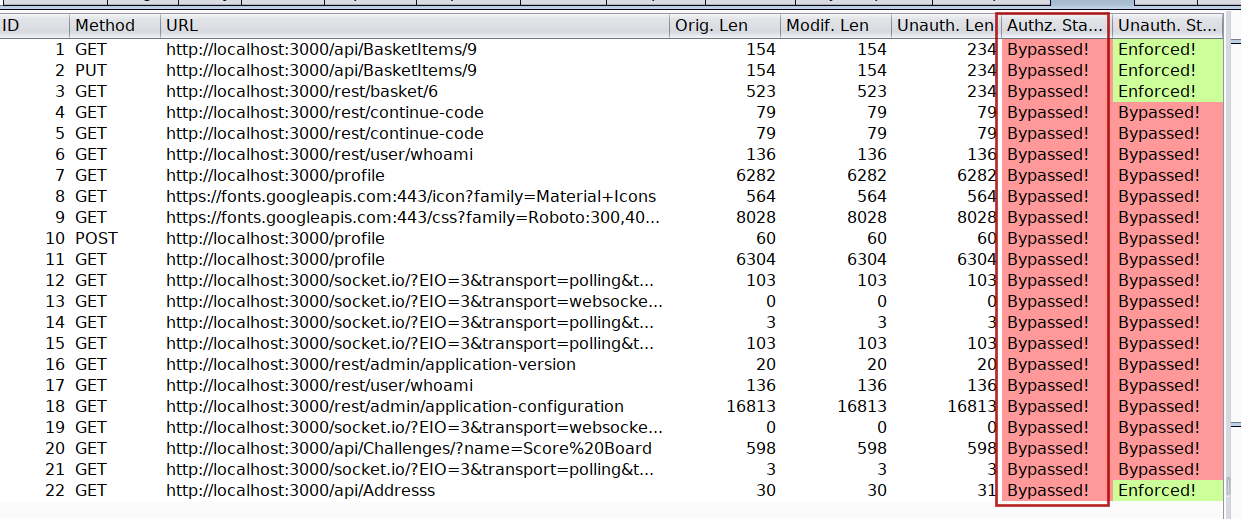
-
You can run the same process to check Authorization issues between user Supervisor and Agent or Supervisor and admin
Note The low privileged user tokens will always be pasted inside the Autorize header input box
Now that we have three different accounts and all three running under same browser which makes it difficult to identify which request belongs to which user inside HTTP history of Burp Suite.
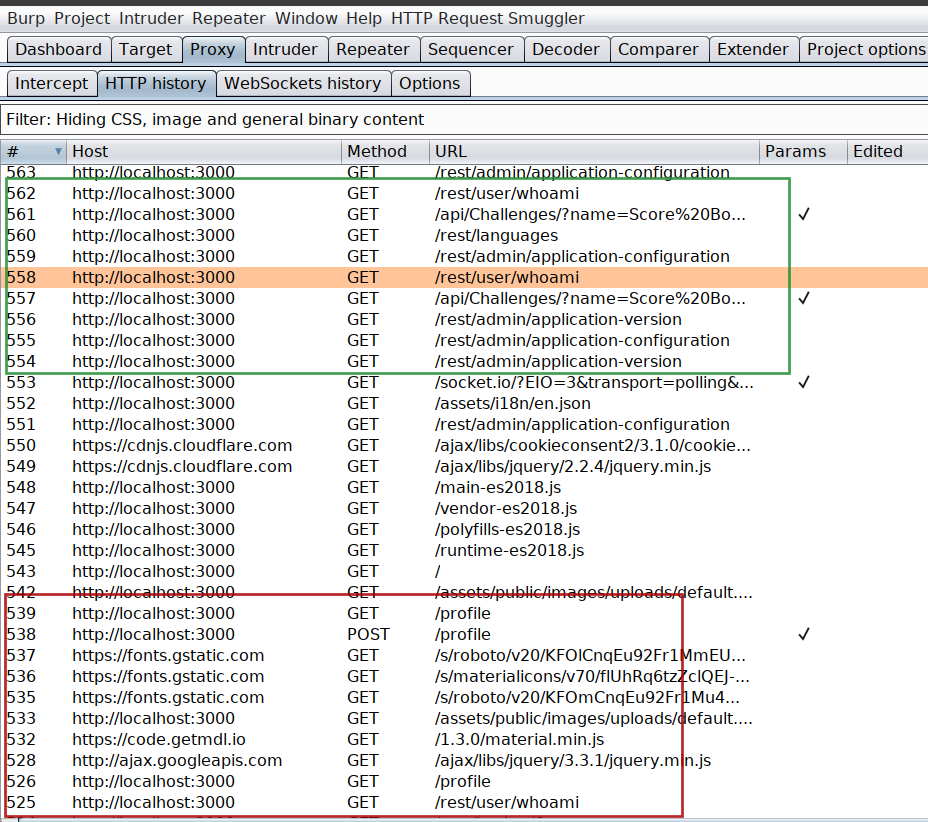
And this is my favorite part in this whole blog. Think what if we are able to highlight the request based on the container tab color which you assigned while creating the container inside Firefox Multi container
Burp Suite Request Highlighter
Request Highlighter is a simple extension for Burp Suite tool (for both community and professional editions) that provides an automatic way to highlight HTTP requests based on headers content (eg. Host, User-Agent, Cookies, Auth token, custom headers etc.). With Request Highlighter testers can easily identify and point out, within the Proxy history tab, requests belonging to different sessions, hosts, browsers or devices - PortSwigger
The definition explains the work of this extension pretty well but we are going to blend its use with firefox containers and take it to next level
How do I install it?
Either you install it from the BApp store inside Burp Suite or you browse to URL https://github.com/portswigger/request-highlighter and follow the intructions. Anyways its super easy to install and use.
Remember my containers colour which I assigned to all three different users, if not have a look at below screenshots
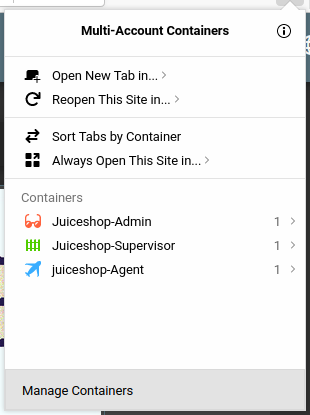


Once the Burp Suite Request Highlighter is installed, identify the admin user request inside Burp Suite HTTP history and select the session token or in my case I have selected the authorization token and right click on Request Highlighter - add highlight and then choose the colour based on your container which in my case for admin user is Red
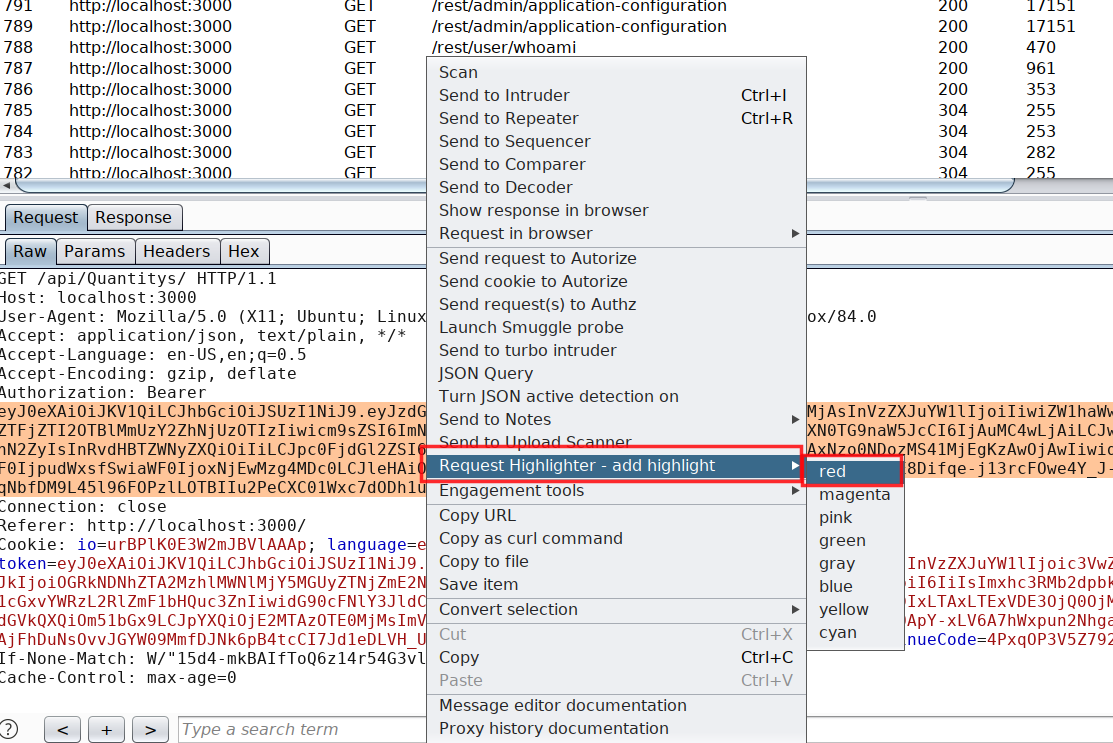
The moment you choose the colour, all upcoming request including all previous request containing the same authorization token will become red. Next I have followed the same process for all the other user based on their container colour. At end it will look like this in HTTP history
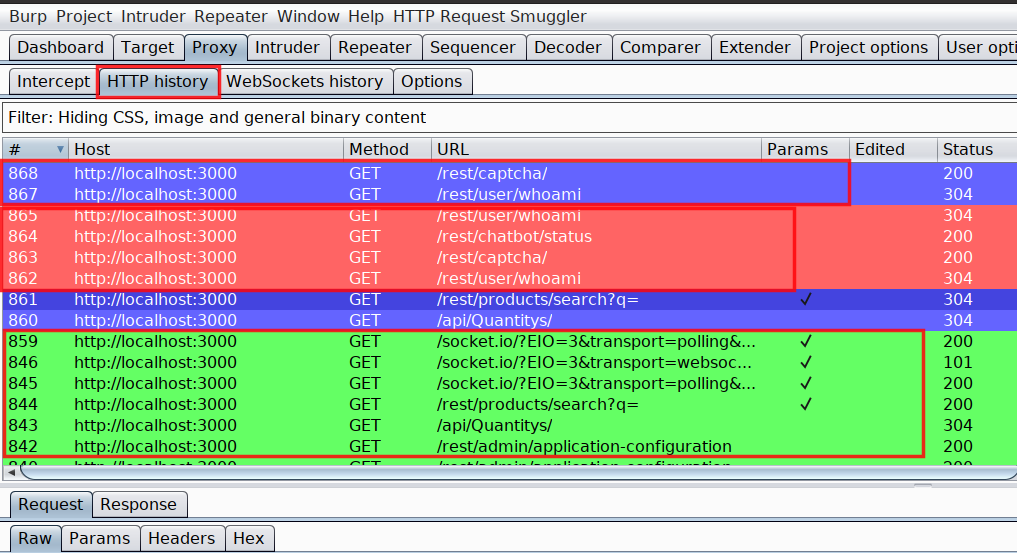
Combination of Firefox multi-container and Request highlighter has helped me a lot in saving time while looking for authorization related issues. And I hope you will defintely find it helpful.
Also, there are some Burp Suite plugins created by people over internet which do both the highlighting and container thing in one plugin but those are not reliable. I had lots of issue with these plugins and found this method to work perfect without any glitches.
The URL to one such plugin(PwnFox) is mentioned in references, in case you wanna try using it
